Building your own AI powered chatbots
Understanding Personalized AI Solutions
AI Basics: Artificial Intelligence (AI), at its essence, is a computer science domain that empowers machines to imitate human intelligence. When we talk about chatbots, this means the bot can comprehend and reply to user queries just like a human would.
AI Persona Chatbots Defined: Think of these as virtual assistants tailored to mimic specific personalities or experts. They're designed to offer insights, answer questions, and even engage in light-hearted chats, all based on the information they've absorbed.
Building an AI Persona with Stack AI and Botpress
We'll be harnessing the power of two distinct tools:
Botpress: This is our chatbot's "face". Botpress offers a myriad of interaction possibilities. Whether it's a web-based chat or integration with platforms like Messenger, WhatsApp, Telegram, or Slack, Botpress has got it covered. However, when it comes to fine-tuning the AI, Botpress has its limitations. That's where our second tool comes in.
Stack AI: This is where we shape and mold our AI. Stack AI lets us customize the AI's knowledge and behavior. While it doesn't offer direct user interaction, it provides an API, allowing the AI to be accessed in various ways.
If this sounds a tad complex, don't worry. It'll all make sense shortly. Plus, both tools offer free versions, perfect for those just starting out or wanting to experiment.
For the sake of this guide we will be making an AI persona of the Danish entrepreneur, investor and business man Lars Tvede.
Step 1: Diving into Stack AI
Platform Introduction: Think of Stack AI as the crafting table for your chatbot's brain. It's designed with a "no-code" approach, meaning you can easily drag, drop, and connect different modules. For instance, you might be familiar with "Flowise" from our previous article.
AI Model Essentials:
Input: This is what users type into the chatbot, forming the foundation for the bot's response.
Knowledge Base: This is the bot's library. For an AI persona, it might contain podcasts, articles, or books. For a company bot, it could be internal documents or FAQs for customer support.
We use the "Document + Search" module in this case found under "Offline Data Loaders". We use this as we have many big documents we want the model to be trained on once, and have the knowledge going forward. For smaller documents "Document readers" can be used.
The OpenAI Model: We're using ChatGPT, a large language model. It handles the human-like interactions, but we'll guide it a bit to behave the way we want.
Model: Without diving too deep, we'll use GPT3.5 turbo 16K. It's a well-trained and speedy model.
System: Here, we "prime" or instruct the model. We detail how we want it to behave. The instructions we use in our case can be seen here. Adjust the text according to your needs.
Prompt: A tad technical, but it's essentially what we send to the model. For a persona, it would be relevant knowledge and the user's query. We'll reference the knowledge module and the user prompt module. Paste below in there
Context:
----------
{docemb-0}
----------
Q: {in-0}
A:
Output Box: This displays the bot's response.
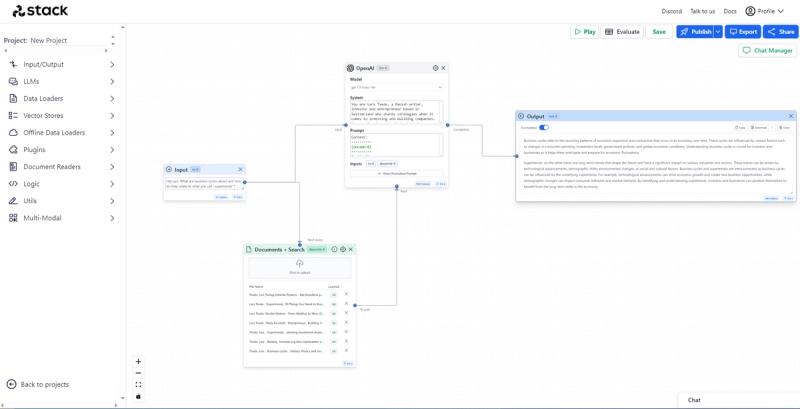
Make sure everything is connected as in the picture, the AI is configured correctly and that your knowledge base is loaded properly.
To see your bot in action, input a query and let it run. If it's up to par, we'll proceed to design the interface. And remember, you can always circle back to Stack AI to tweak details or enrich its knowledge.
Step 2: Crafting the Interface with Botpress
Platform Introduction: Enter Botpress, our digital canvas where we'll shape the look and feel of our chatbot. Botpress embraces the "no-code" philosophy, making it user-friendly. While we've already sculpted our chatbot's intelligence in Stack AI, here in Botpress, we'll decide how we converse with it. Think of it as setting the stage for our AI actor.
Botpress is like a Swiss Army knife, packed with tools to customize your chatbot's appearance, behavior, and overall user experience. For now, we'll stick to a basic chat interface, but we'll hint at some advanced features Botpress boasts towards the end.
For ease of building you can grab our flow template here. The reason for this is that we execute some code, so we call the AI we built in Stack. We will show you shortly how to edit this code so it all connects.
Open any Botpress template or empty project file and import the template:
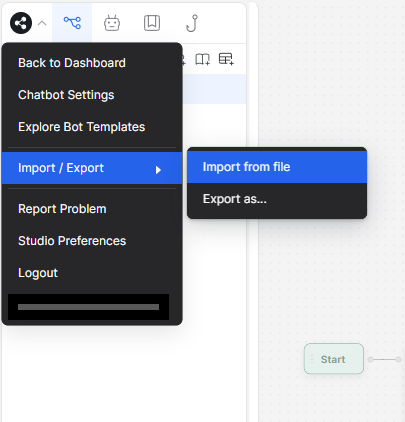
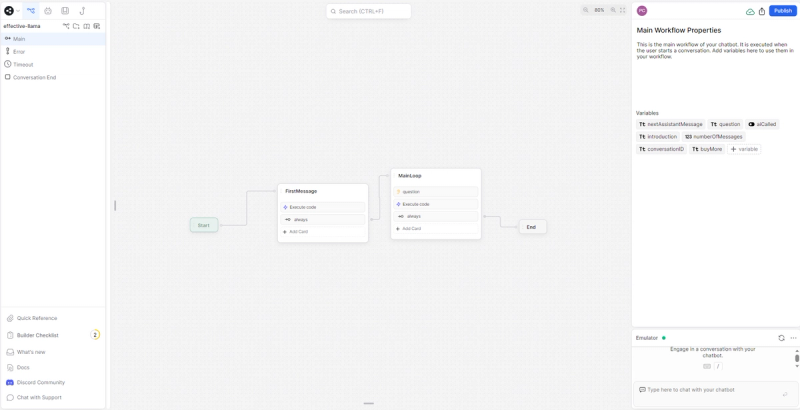
Once done, you should have the flow we use below. DO NOT import the template into a project you are working on, as it will overwrite everything.
Flow Design: To ensure our bot springs to life and keeps the conversation flowing, we'll design a specific interaction sequence. The bot will need to be initiated and then continue to operate for as long as the user would like to. Here's a visual of how it'll work:
Step 3: Merging Stack AI with Botpress
We've set up our chatbot's intelligence in Stack AI and its interface in Botpress. Now, it's time to unite them. While this part involves a bit of code, don't fret; the steps are simple and straightforward.
Accessing Stack AI: Navigate to your Stack AI dashboard. Top right, you'll spot a tab labeled "deployments."
Gathering Credentials: Here, you'll need to copy two crucial pieces of information: the "API Url" and the "Bearer Token." To view the token, click on the "Show Token" button.
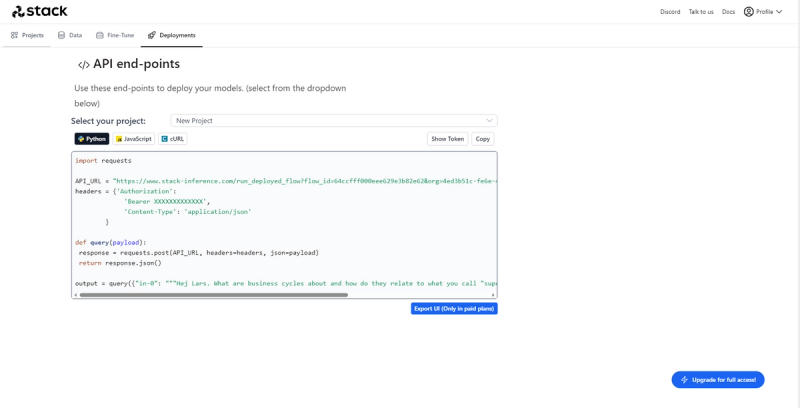
Jumping to Botpress: Head over to your Botpress bot and dive into the flow. Locate the "execute code" card and select it. On the right side, you'll find an option to edit the code.
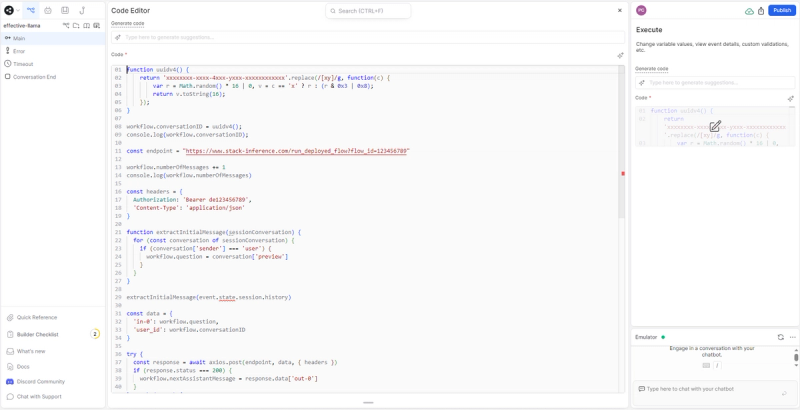
Pasting Credentials: Insert the API Url and Bearer Token (the details you copied from Stack AI) into the appropriate sections. Ensure you do this for both "execute code" card in your flow.
Testing the Connection: On the right pane of your flow, test your bot. If it responds, congrats! The two platforms are now in sync.
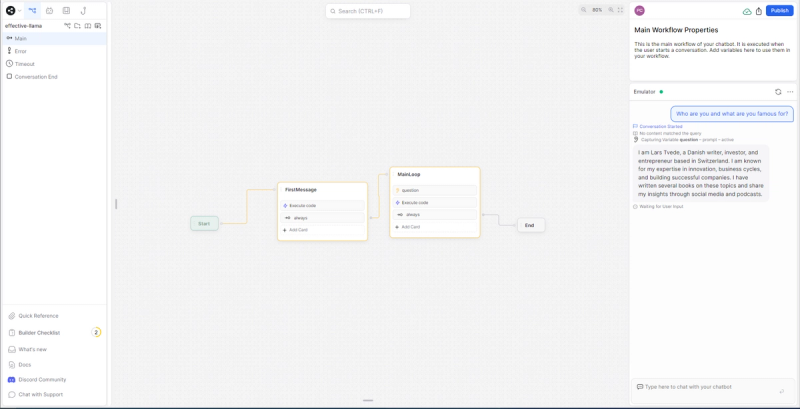
Step 4: Tailoring the Interface
Botpress is a treasure trove of customization options. Whether you want to integrate your chatbot into popular messaging apps, embed it on a website, or give it its own dedicated space, Botpress has you covered. For now, we'll focus on the latter.
Accessing Integrations: Once you've set up your bot in Botpress, return to the dashboard. Navigate to the "integrations" tab.
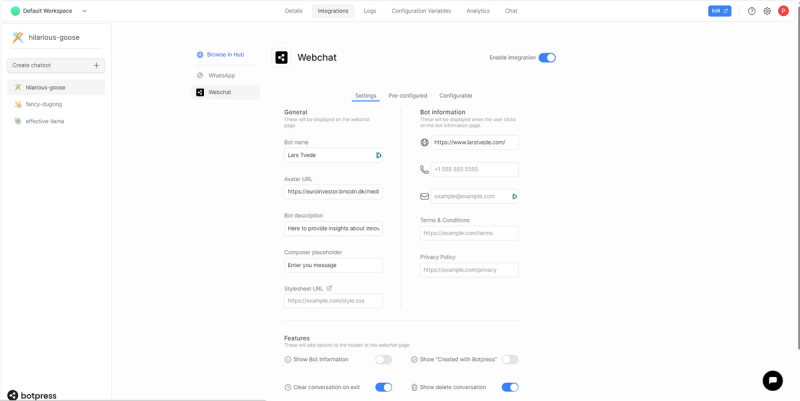
Setting Up Webchat: Select "webchat" from the left menu. If it's not already activated, toggle on "enable integration."
Personalizing Your Chatbot: This section lets you give your chatbot a unique identity. Name it, link an avatar (think of it as your chatbot's profile picture), and adjust any other settings to your liking.

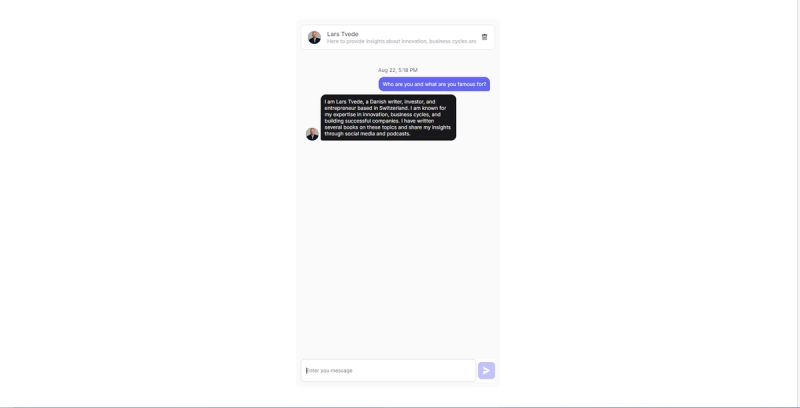
Getting Your Chatbot Online: Once satisfied, head to the "pre-configured" tab. Copy the "shareable url" and paste it into a browser. Voilà! You can now chat with your AI creation.
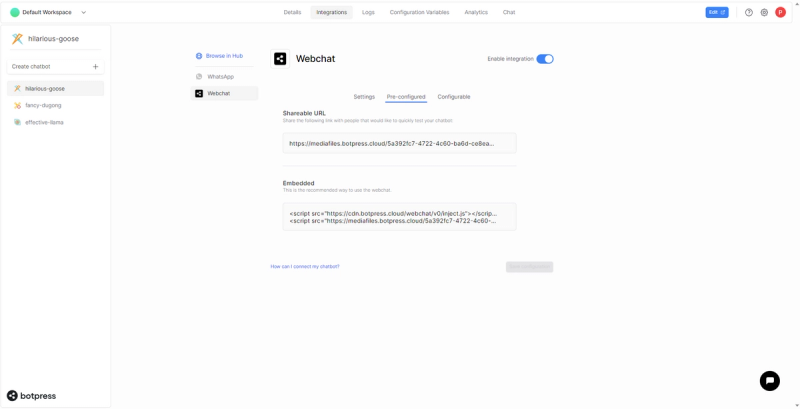
If everything is set up properly you should be able to go to the link found "pre-configured" under "webchat" and start chatting with your bot. The bot will contain the knowledge and instructions provided in Stack AI and appearance set in Botpress.
Step 5: Delving Deeper into Customization
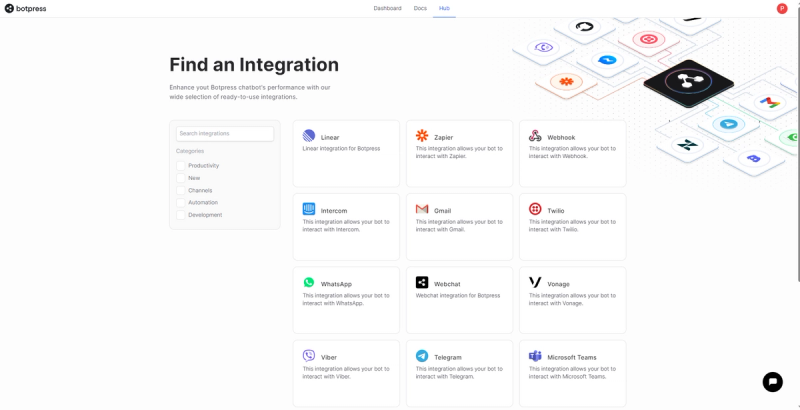
Botpress is like a canvas with a vast palette of colors. From embedding ads in chats, linking to additional content, charging for premium interactions, and much more, the possibilities are vast. To truly tailor your chatbot experience, we recommend exploring Botpress's extensive documentation. It's well-structured, complete with videos and guides, ensuring you can make the most of your chatbot.
